Showing posts with label Punches. Show all posts

Friday, January 15, 2016

Another Happy Card


I told you that you'd see this layout again!  In fact, this card came before the one I shared earlier.  I totally CASED this from my friend Bonnie.  I LOVED what she did - I just changed the colors and a few minor details.


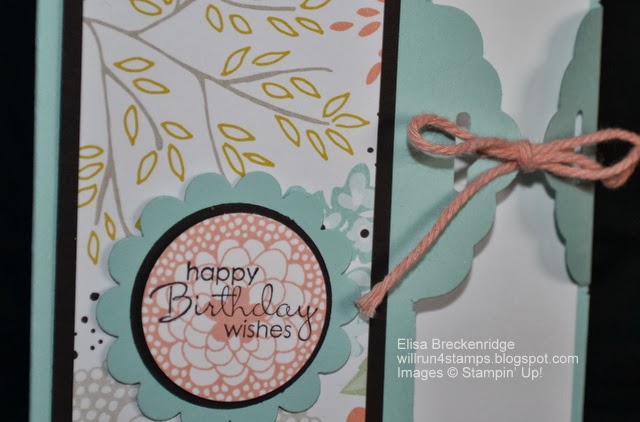
This picture really shows off the Specialty Designer Paper with pre-embossed designs.  I just sponged over the designs in the color I wanted to use.  Easy Peasy!
 

Monday, January 11, 2016

Paper Purse Gifts


Aren't these purses fun?  I'd come across the idea somewhere online (and loosely used this video tutorial as a guide) and made a whole bunch of these for my stamping friends.  I added a few goodies to the bag and it made a fun gift.  


Here's the whole group in different colors.  They really standout with the black and white DSP!


Friday, January 8, 2016

Happy Cards


Here's a group of 'Happy' Cards that I made for swap awhile back.  This is one of my FAVORITE layouts.  You probably definitely will see this layout again. 


What I love about this design is that you can replace the 'Birthday' with just about any phrase from the Crazy about You stamp set/bundle.  Very Versatile!


I'm playing catch up on a bunch of projects I did last year and never posted.  I hope you enjoy them!
Have a great weekend! 

Sunday, January 3, 2016

Teacher Christmas Gifts 2015


Happy New Year!
A few more Christmas ideas/gifts before the new Occasions catalog starts on Jan 5, 2016.  These were some of the gifts we gave to my kids teachers this year.  It included Wood Stamp Case Gifts, Gift Bow Die Angel Ornaments and Hand Santa-tizers.


I love making these hand Santa-tizers.  They're fairly easy, very inexpensive and super cute! 


I've been packaging the teachers' gifts like this for the past few years.  I saw it on Pinterest and it seems to be even more popular this year.  There are many variations.  I use a retired snowflake die (cut in half) for the antlers.   

Tuesday, December 29, 2015

Peace on Earth Window Flip Card


Another Christmas card to share from this year.  I thought it would be a perfect layout for the Happy Scenes stamp set (which I got FREE at Convention this past July!).    

I've actually made this layout before, but I have yet to post it.   I was inspired and used the tutorial (found HERE) by Julie Davison (my stamping idol!)


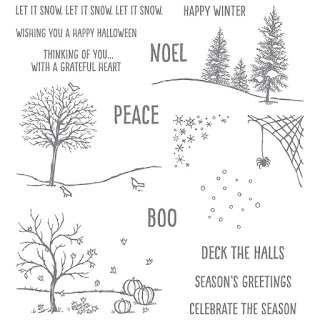
Happy Scenes
Happy Scenes Photopolymer Stamp Set

 I hope you had a wonderful Christmas!


Thursday, December 24, 2015

Season of Peace Card


Merry Christmas!  

This was a difficult card to photograph, but I think you can get the idea.  I embossed the snowflakes and then sponged and stamped over them.  Easy and beautiful. 
  

Thursday, December 17, 2015

Thanksgiving Turkey Mini Tic Tac Sliders


Here is the Thanksgiving version of the mini tic tac sliders I made to hand out.  I just fell in love with the idea as soon as I saw it!  Make sure to see my Christmas version, too.  I got the idea and video tutorial here


These mini tic tacs come in packs of 3 at the Dollar Tree.  What a quick and economical gift!  Not to mention ca-ute!


Tuesday, November 11, 2014

Wonder Woman Birthday


What do you do when your daughter wants a Wonder Woman themed birthday and NO ONE sells Wonder Woman ANYTHING???  Well, you MAKE it of course!! 

If you saw my daughter's Halloween Costume, you'll know she is a big fan of Wonder Woman.  She loves watching the old shows on Sci-Fi Saturday Night.   

Luckily I had these small red paper bags (bought on clearance after Valentines Day who knows when) in my stash along with some leftover white stars from these cards on my desk. After staring at her Wonder Woman shirt for a long time, it hit me - I knew how to make the 'W'.  I die cut the 'W' and then used a retired picture corner punch (cut in half) for the 'wings'.  Voila!  It worked and she was happy!


Now, what do you do when you need a Wonder Woman cake for the birthday party?  MAKE it of course.  Well, not really.  I found this 'super-hero looking' cake at Wal-mart and added a Wonder Woman Little People figurine.  Phew!  Mission Accomplished!
Does that make me Wonder Wo-MOM?   :)


Sunday, March 16, 2014

Good as Gold


I'll be honest.  When I first saw the Good as Gold kit in the Sale-a-bration catalog, I thought 'What am I gonna do with that?'  After I attended Leadership and saw samples of the cards I started to warm up to the kit.  A little.  Then I started seeing samples that were 'outside of the box' and showed smart ways to use these products for anything but their intended purpose.  Now they're talking my language!  So, I took the plunge, got the kit and made these fun and super simple cards.  I was inspired by this card.  I love the splash of sparkling gold. 


The 'Designer Paper' I used is actually the card bases that come in the kit.  I cut them in half and mounted them on cardstock.  So, instead of 8 cards that the kit is supposed to make, I can get twice that amount by adding just a bit of extra cardstock!  Yippee! And all of this with a kit I got for FREE with a $50 order.  Double Yippee! 
Note:  I cut apart the gold envelope liners to make the background layer for the sentiment tag.  The gold star and gold ribbon are also included in the kit.  


Enjoy!
 
Cardstock:  Whisper White, Island Indigo, Good as Gold Kit (SAB)
Ink:  Island Indigo
Stamps:  Sassy Salutations
Punches:  Scalloped Tag Topper Punch


Thursday, March 13, 2014

Happy St. Patrick's Birthday!


I have a few birthdays in my family on St. Patrick's day, so I wanted to give a go at a green-themed birthday card.  It also worked out as part of the Splitcoaststampers Creative Crew Challenge for March:
  • CCREW0314HF, CreativeCrew, SUO or SUM -- For this challenge, make a birthday card in purple (for St. Urho) or green (for St. Patrick). Use a technique or layout that you love!
I've seen this type of card all over and have wanted to try it for awhile.  I used the directions/tutorial found here for the card assembly.  It was super easy!   
The almost-finished card needed something, so I got out my handy dandy green Sharpie and colored some rhinestones.  I love how they finished it off.  I needed to keep it somewhat masculine and even with the little 'bling' it's not too girlie.  What do you think? 


I also used a quick tutorial on how to make the shamrock from the Pansy Punch HERE.  Easy Peasy!


Thanks for stopping by!

Cardstock: Crumb Cake, Whisper White, Wild Wasabi, Sweet Sorbet DSP (SAB)

Ink: Crumb Cake
Stamps: Happy Hour, Wacky Wishes
Accessories: Rhinestones
Punches: 2-1/2" Circle, 2-3/8" Scallop Circle, 1-3/4" Scallop Circle, Pansy, Banner
Other: Sharpie


Wednesday, March 5, 2014

Sweet Sorbet meets Scalloped Tag Topper Punch


After having such a hard time using the color Crisp Cantaloupe in cards, I'm starting to warm up to this color!  Using the Sweet Sorbet Designer Paper makes it so much easier to find coordinating colors that look great together.  I've seen this style of card using the Scalloped Tag Topper Punch all over the internet, but it wasn't until I watched this video that I decided to give it a whirl.  I was also inspired by this lovely card


The colors in this Designer Series Paper (DSP) are really pretty together and make creating a beautiful card easy!  I'm thinking this is a great card for the Splitcoaststampers Creative Crew Challenge for March:

  • CCREW0314DF, CreativeCrew, SUO or SUM-- DSP/Color Focus: Make us fall in love with your favorite DSP! You can use any current DSP from the annual, Occasions, or Sale-A-Bration catalogs!
Get your package of Sweet Sorbet DSP for FREE during Sale-a-bration (SAB)!  Choose any of the exclusive SAB products with each $50 purchase through March 31. 

Cardstock:  Pool Party, Whisper White, Basic Black, Sweet Sorbet DSP (SAB)
Ink:  Crisp Cantaloupe, Black Staz-On
Stamps:  Petite Pairs, Petal Parade (SAB)
Accessories:  Crisp Cantaloupe Twine (Sweet Sorbet Accessory Pack - SAB)
Punches:  Scalloped Tag Topper Punch, 1-3/4" Scallop Circle, 1-1/4" Circle, 1-3/8" Circle

Monday, March 3, 2014

Live Happy Chocolate Treat and Leadership Recap


I'm still playing catch up on sharing some projects and today it worked out great to share this little gift of chocolate.  I made these as part of my roommate gift package for my roommates/friends at Leadership in Houston in January.  I used the Envelope Punch Board and was able to crank these out in a flash.  I had the mini Hershey's bars and used the instructions found HERE


I'm also sharing these as part of the Splitcoaststampers Creative Crew Challenge for March:
  • CCREW0314CF, CreativeCrew, SUO or SUM -- Catalog Focus: Envelope Punch Board or Simply Scored. Show us what you love about these awesome tools!
As soon as I saw that you could create so many 3-D projects with the Envelope Punch Board, I HAD to have it! 

Speaking of Leadership Roommates...


We had SOOOO much fun!  I can't even begin to say how great it was to spend several days with these ladies!  I know we are all counting down the days until we can see each other again at Convention!


Want to go to Convention for FREE?  You can join me and others while we have a BLAST and get great stamping ideas.  Join my group TODAY and get your registration convention for FREE!  Ask me for details.  I'd love to have you join me in Salt Lake City!  

Cardstock: Very Vanilla, So Saffron, Tangerine Tango, Retro Fresh DSP
Ink: Coastal Cabana
Stamps: You're Lovely (SAB)
Accessories: Envelope Punch Board, Coastal Cabana 3/8" Ruffle Stretch Trim
Punches: 1-3/4" Scallop Circle, 1-1/4" Circle, 1-3/8" Circle


Friday, February 28, 2014

Valentine's Day In Review - Part 2


As you can see, I've been in 'craft mode' recently.  The other Valentine's goodies I made can be found here.  So, once I finished all of the goodies for the kiddos, I started on goodies for the adults.   
Aren't these cute boxes?  And I couldn't believe how easy and quick they were.  I made 5 from one sheet of cardstock!  These were perfect little gifts to fill with chocolate and give to some of the staff at my daughter's school.  Very fun!  I was inspired by Julie - again! 


Below is the tag I made for my daughter's teacher.  She likes gummy bears, so we bought a bag and decided to play on the words - You're Beary Amazing.  


Valentine boxes:
Cardstock:  Real Red, Pretty In Pink, Very Vanilla, Sending Love Specialty DSP (retired)
Ink:  Real Red
Stamps:  Teeny Tiny Wishes
Accessories:  Vanilla Seam Binding Ribbon
Punches:  Scalloped Tag Topper Punch, 1-1/4" Scallop Circle, Modern Label, Small Heart

Gummy Bear Tag:
Cardstock:  Very Vanilla, Soft Suede, Red Glimmer
Ink:  Early Espresso
Stamps:  Under the Stars (retired), You're Amazing
Punches:  Scalloped Tag Topper Punch, Owl Builder (heart)


LinkWithin

Related Posts with Thumbnails